In most cases, the Try It feature automatically generates JWT access token for the API endpoint being tried, allowing you to invoke the API endpoint without any additional authentication steps.
For restricted-use APIs, the access token may not be auto-populated. This typically occurs when additional whitelisting is required.
Follow the steps in this guide to manually obtain a valid token using the OAuth Playground and retry the API request.
Prerequisites:
a. Valid billing account on SLB Digital platform & access to SLB Developer Portal
b. Member of a team in SLB Developer Portal.Application and Client Details from the Developer Portal: Make sure you have the following details related to your application and OAuth Client from Developer Portal.
2.a App Key
Important!Follow below steps only if the SLB cloud API you want to try requires an app key/ API key to be included in the request header. If the API does not require an app key, you may skip this section and go to 2b. Client ID and Client Secret section.
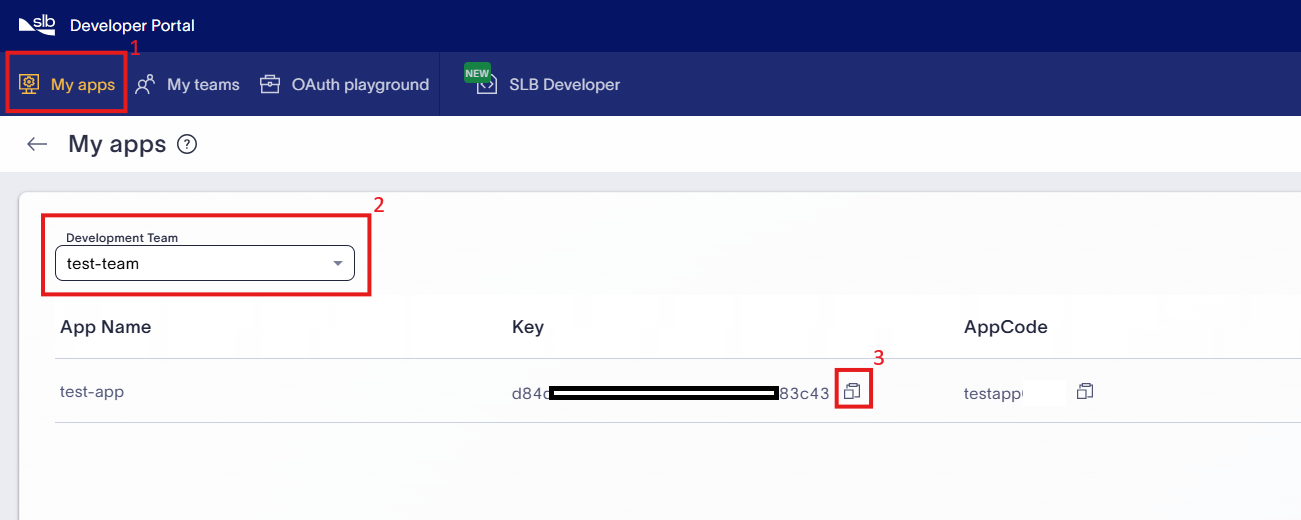
- If you have an existing app, visit My App page of Developer Portal. Copy the app key value of app from the list of apps, using copy button highlighted in below screenshot.
- If you do not have any existing app, follow Create an App guide to create app. Once you create app, follow above steps to get the app key.
2.b Client ID and Client Secret
- OAuth clients can be created under an App in the SLB Developer Portal.
-
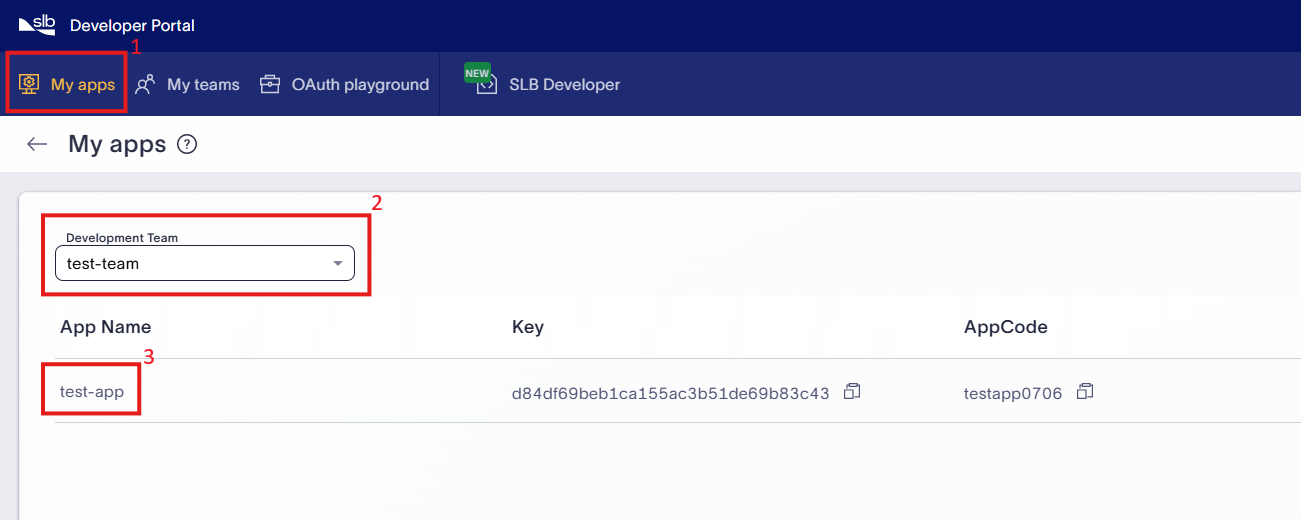
If you obtained the app key using a specific app in the previous step, make sure to use the same app to retrieve the Client ID and Client Secret values. If you do not have any existing app, follow Create an App guide to create App. For existing app, visit My App page of Developer Portal. As shown in below screenshot, select the development team and then select the app to view app details.
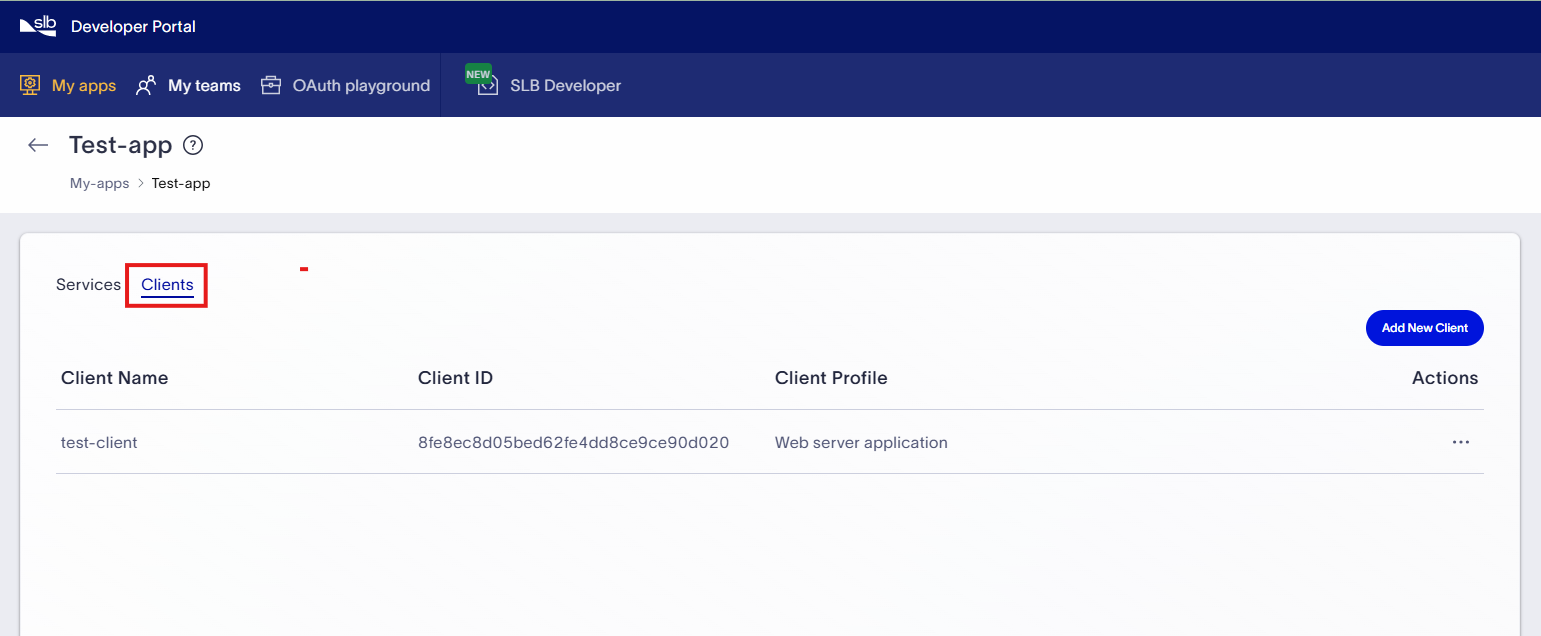
- Click on Client tab to view the list of OAuth clients
-
You can either use existing client or create new client. Refer below sections for details.
Use existing Client
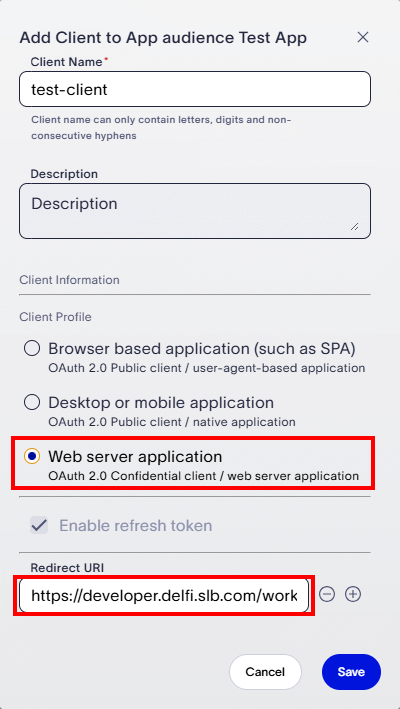
- Choose the Client ID whose Client profile value is of type Web Server application.
- Add "https://developer.delfi.slb.com/workspace/oauth-playground" as one of the redirect URI for this client.
- You should know the Client Secret. Client Secret is shown during only client creation process.
Create new Client
- Click on Add New Client button
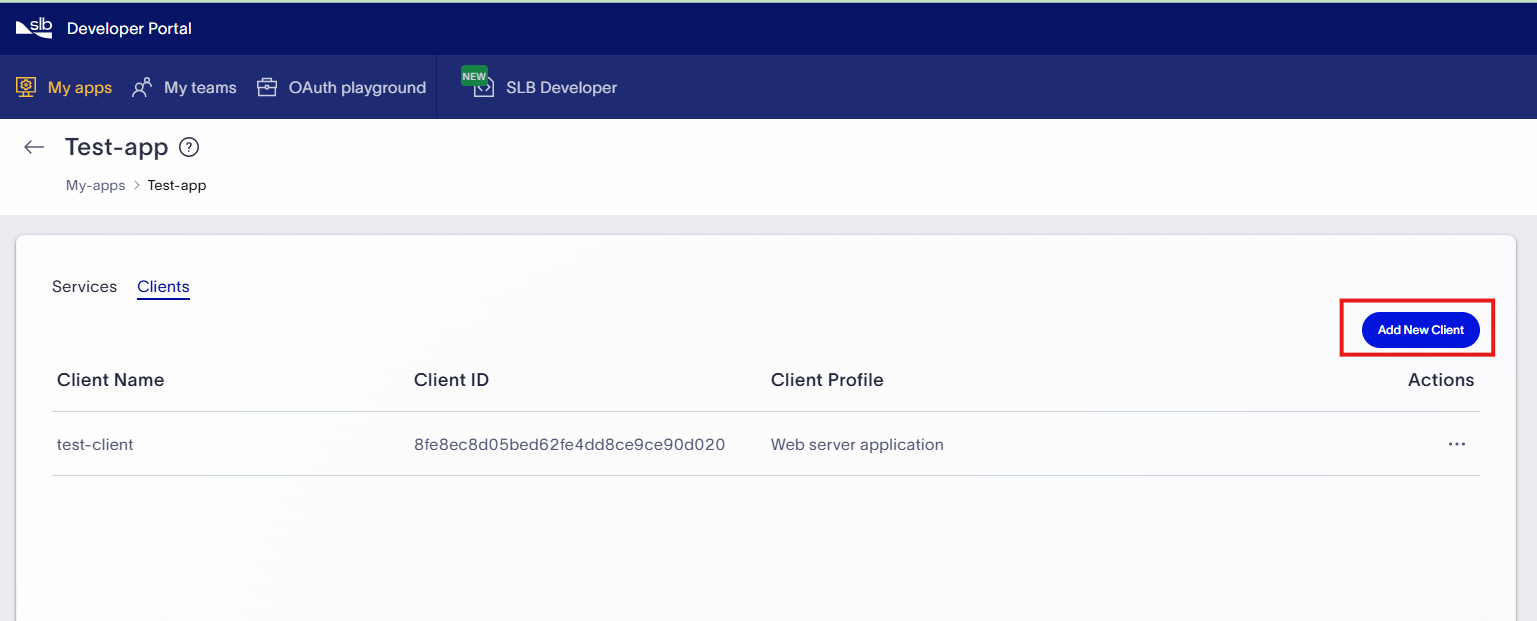
- Make sure Client profile should be of type Web Server application. Add "https://developer.delfi.slb.com/workspace/oauth-playground" as redirect URI for client
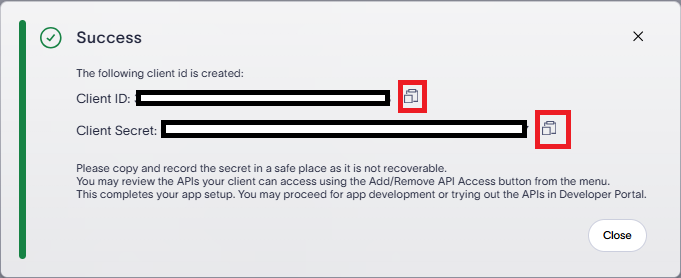
- After creation of Client, Client ID and Client secret are shown to user. You can use copy button to take note of the Client ID and Client secret. Make sure to copy and paste the secret to safe place as it is not recoverable. Refer below screenshot for details
- If you have an existing app, visit My App page of Developer Portal. Copy the app key value of app from the list of apps, using copy button highlighted in below screenshot.
Now you should have API Key (If API which you want to try require it), Client ID and Client secret value ready to use. Make sure Client configuration is done as mentioned in previous step. Ensure that your client ID is whitelisted to call the restricted-use API. Contact Customer Support for Digital.
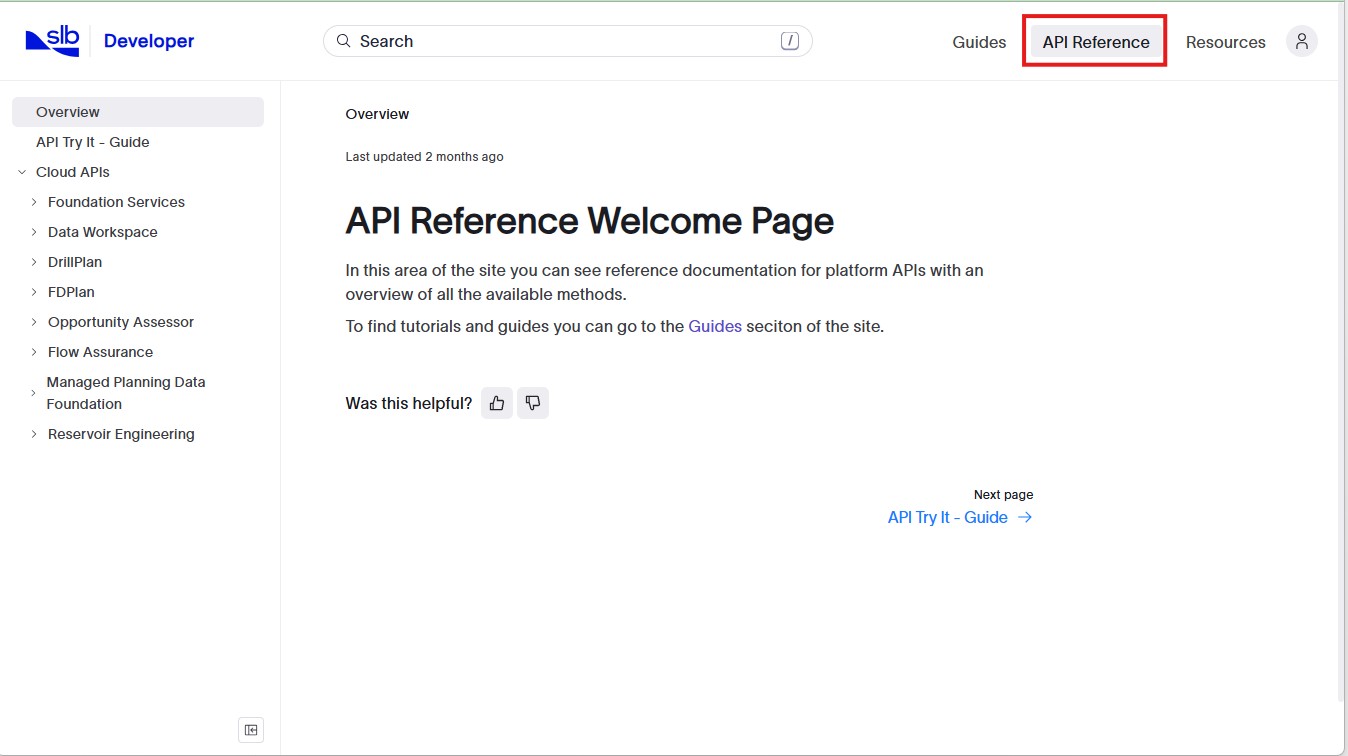
In the top right corner of the SLB Developer, click API Reference.
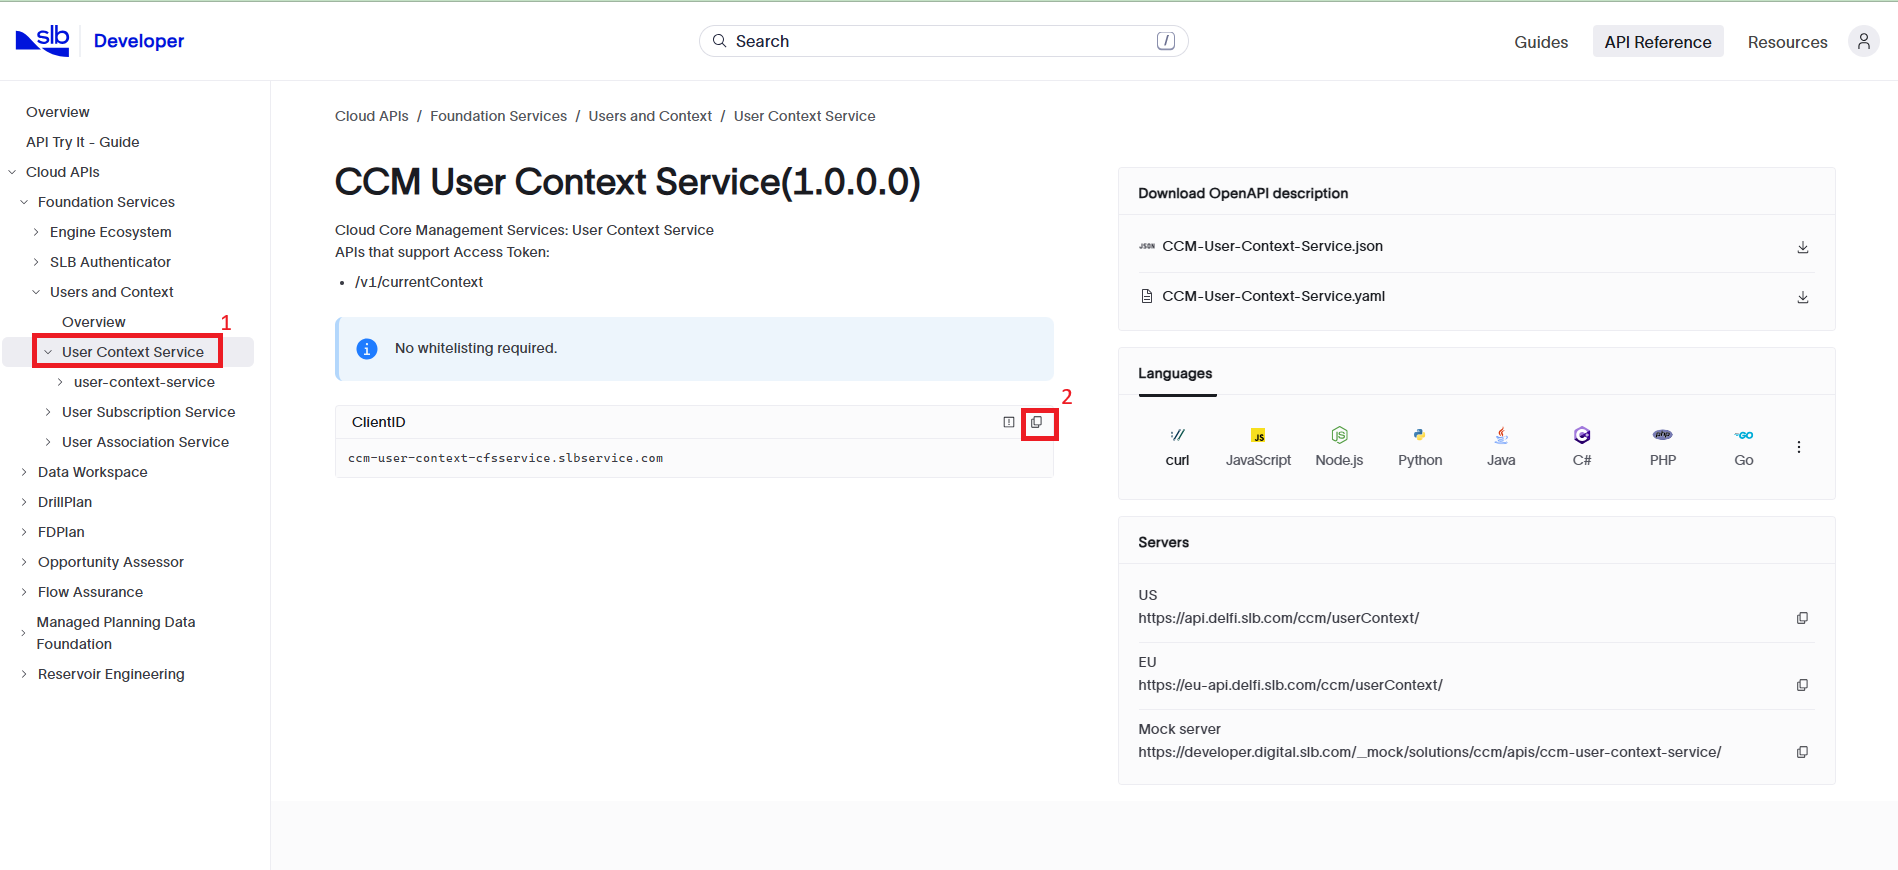
Click on API name in left side navigation tree of API Reference page. E.g. In below screenshot, API specification for User Context service is shown. Copy the client id value of API as it will be required later during the token generation.
To Try specific end point, select an API endpoint from the left side navigation tree as shown in below screenshot.
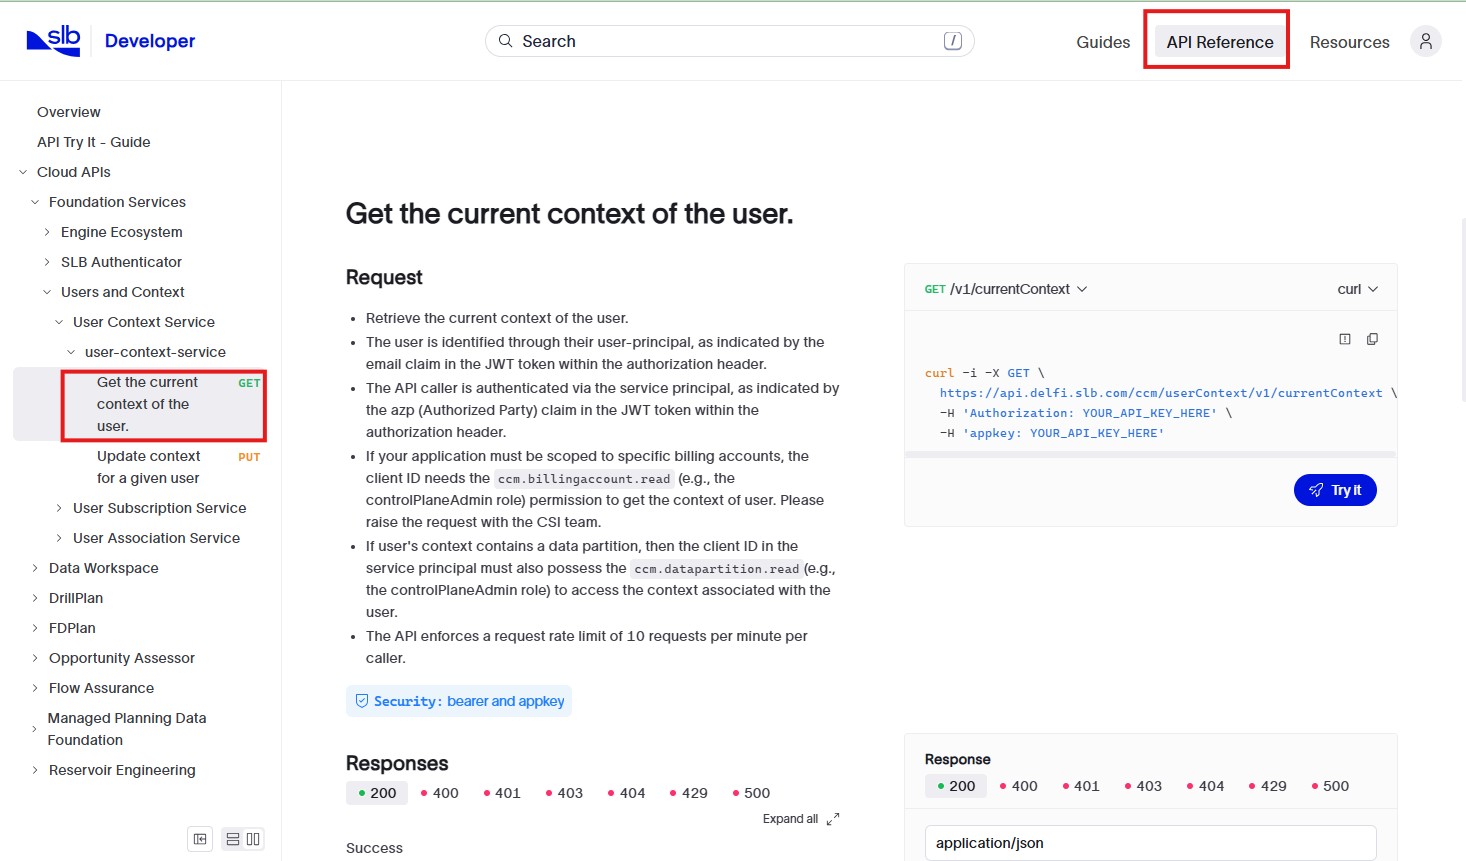
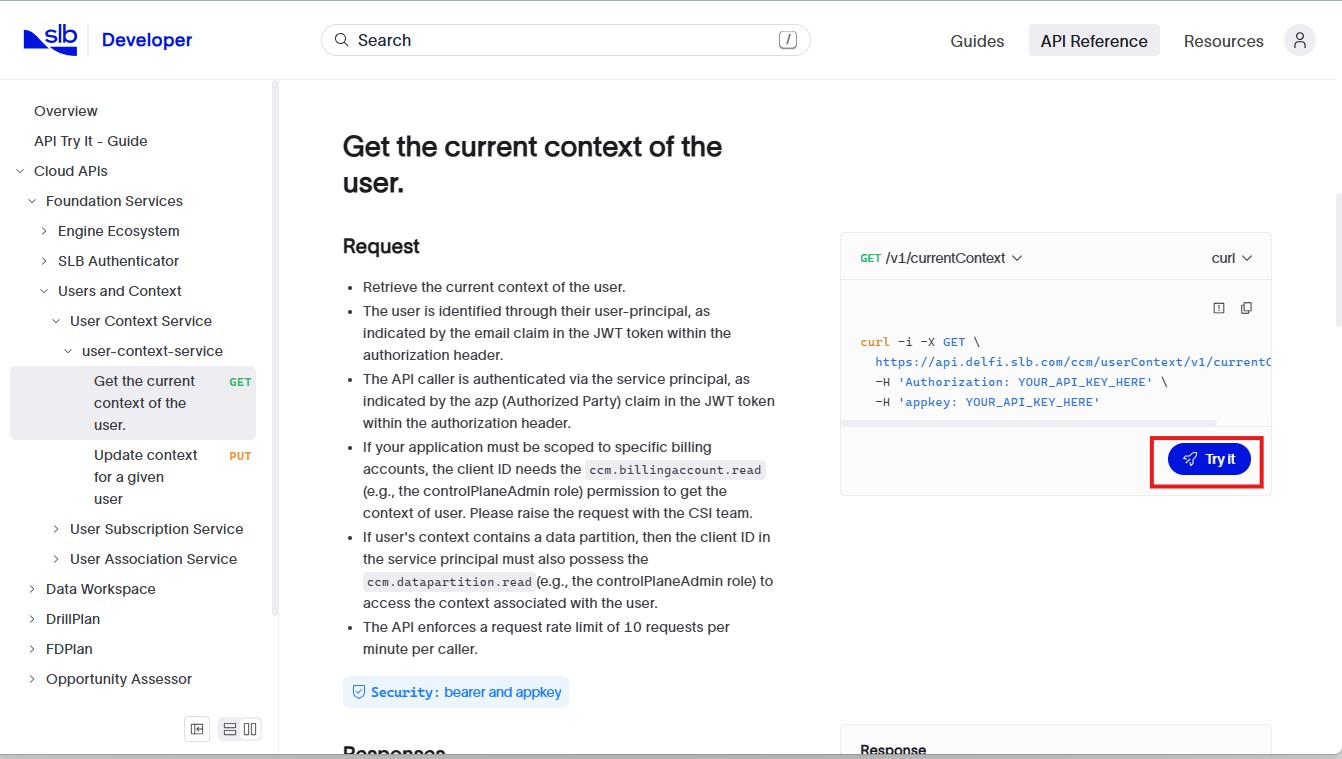
Click on "Try It" button.
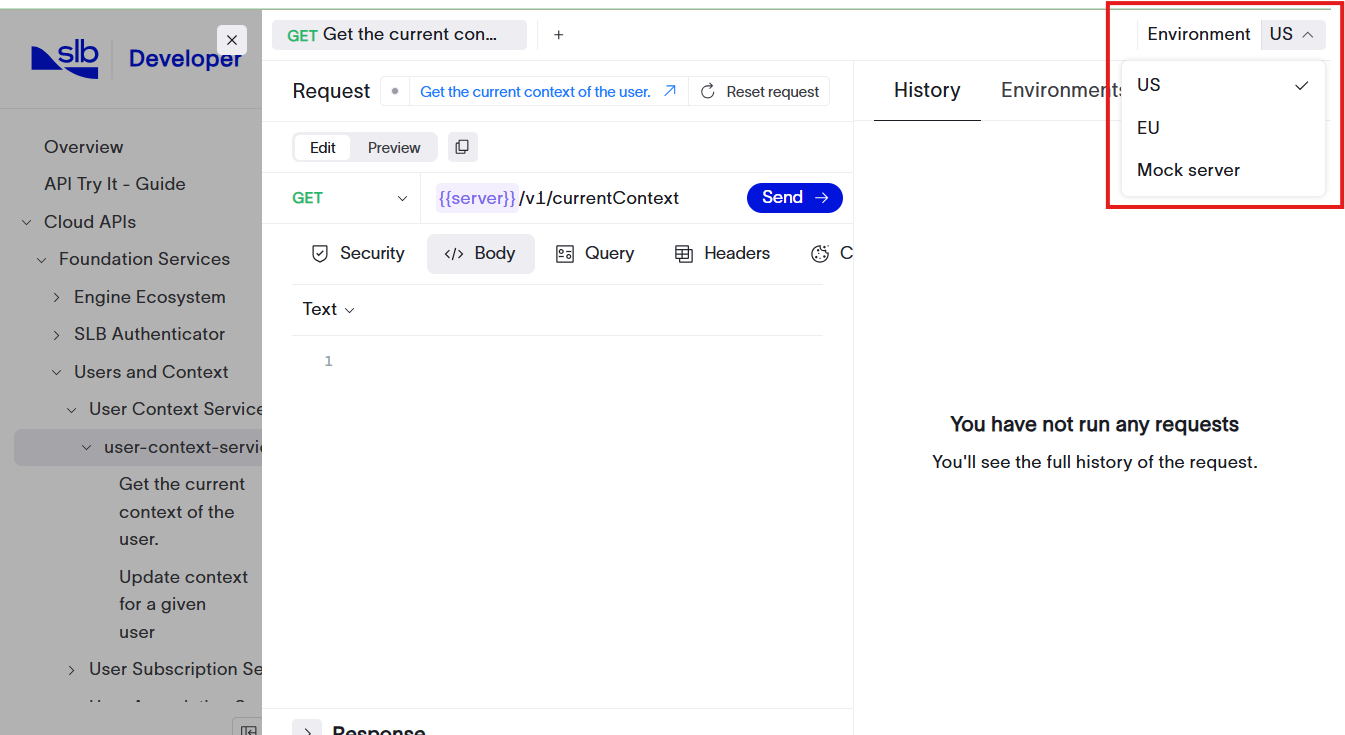
Select Environment: On "Try It" screen, The Environment drop-down in the top right corner lists the available servers. Select the appropriate environment. If you are an existing customer, and this drop-down shows "Mock server" or "https://developer.digital.slb.com/", contact your SLB support representative to determine the correct server for your API.
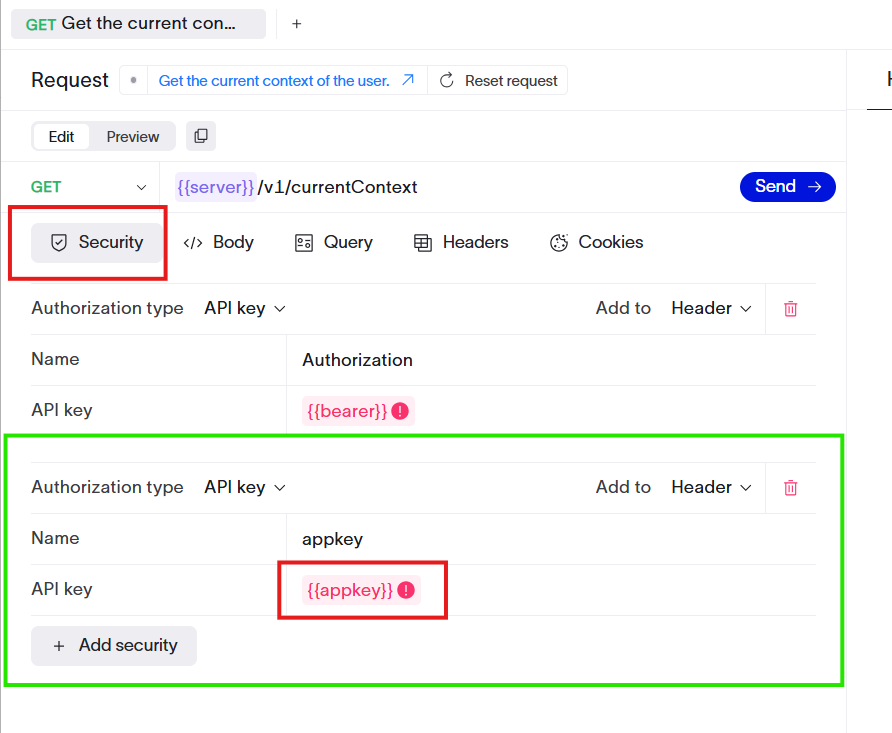
Provide App Key: If the API requires an app key in the request header, enter it on the Security tab. Refer Step 2 for details on how to get app key.
Provide S-Auth token: An S-Auth token issued by SLB Authenticator is required to call APIs on the SLB platform. You can get this token using OAuth Playground utlity present in Developer Portal. The OAuth Playground is a zero-code utility where you can perform an OAuth Authorization Code Flow to obtain Access and Refresh tokens. Developers can use the OAuth Playground in the Developer Portal when they want to quickly explore APIs of interest without having to worry about writing complete code for authentication and authorization flow. More detail guide on OAuth playground is present here. However below steps will be sufficient in this context. Follow below steps to get S-Auth token
- Launch the OAuth playground from the SLB Developer Portal.
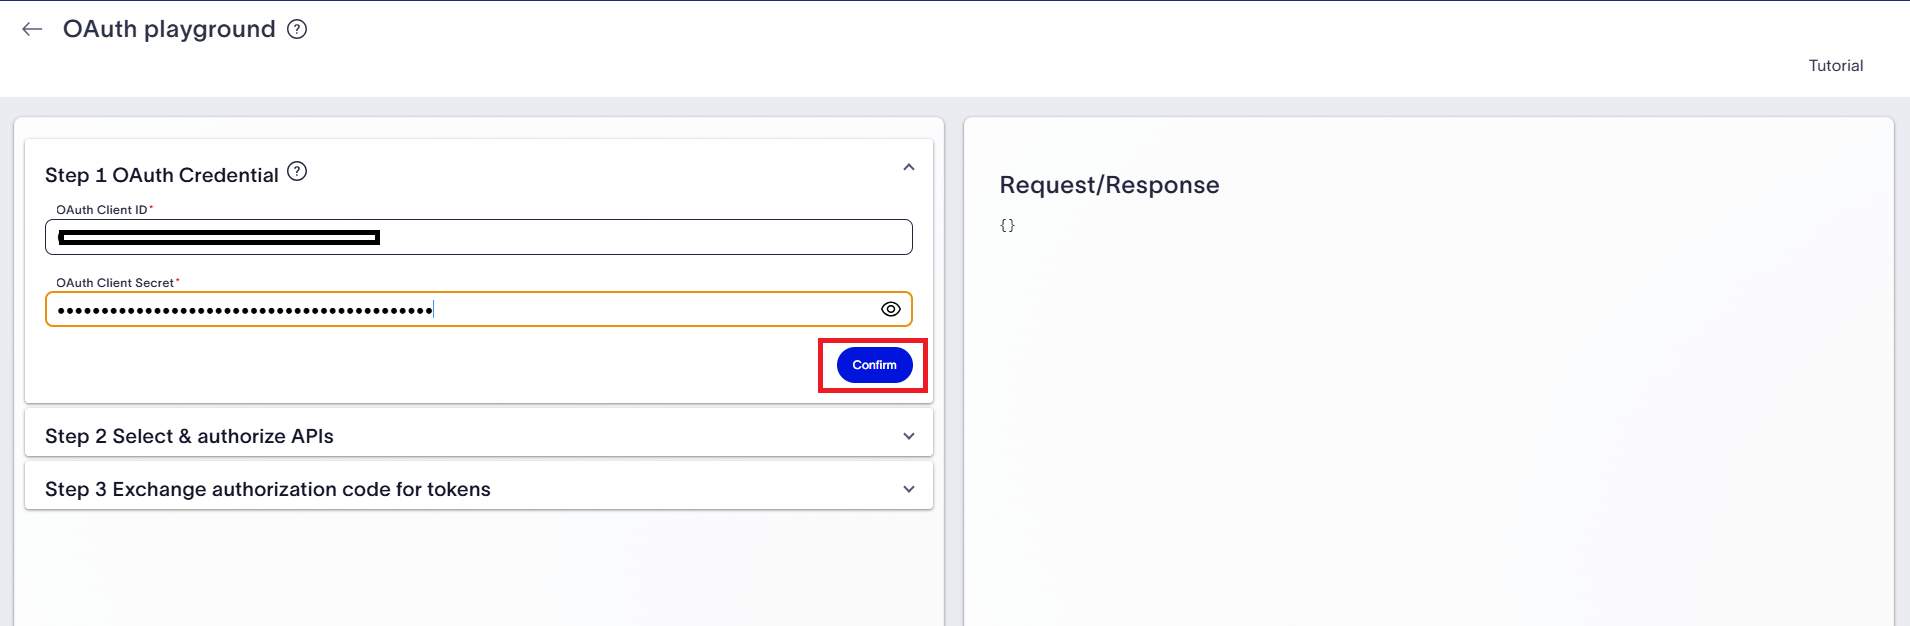
- Input Client ID and Client Secret you got in step 2. Click on Confirm button as highlighted in below screenshot
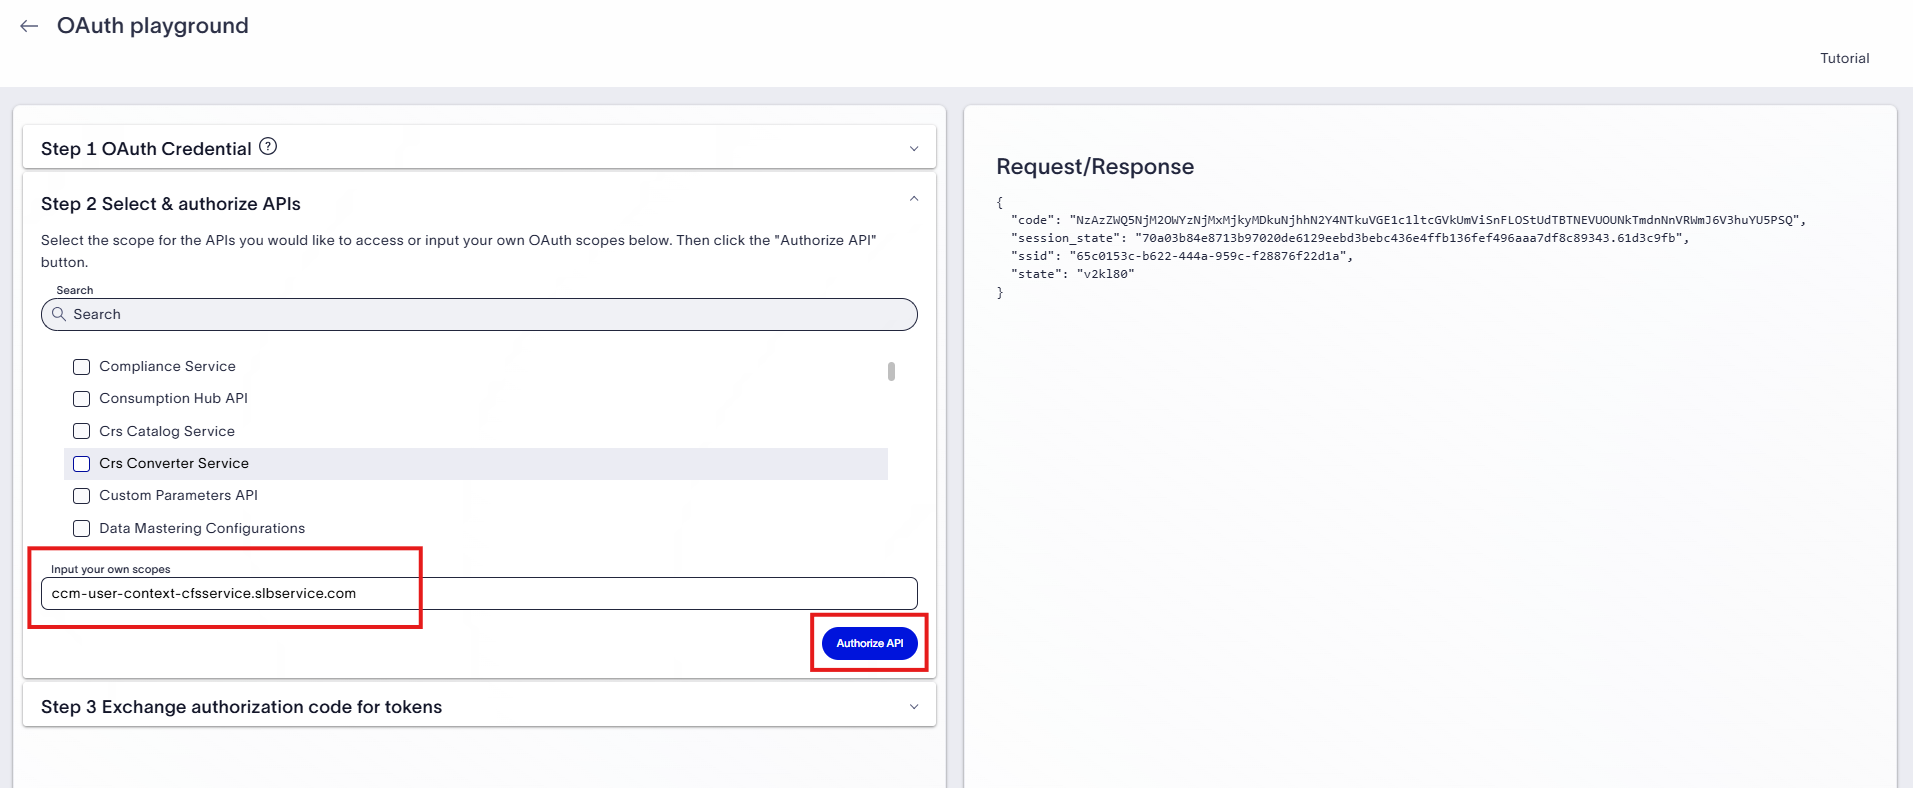
- On the next screen, either select an API from the predefined list or manually enter the API Client ID. Refer step 5 to know how to get the API Client ID. The screenshot below demonstrates how the API Client ID for the User Context Service was added manually. You may enter multiple API Client IDs, separated by spaces, in the designated input field. Click the Authorize API button.
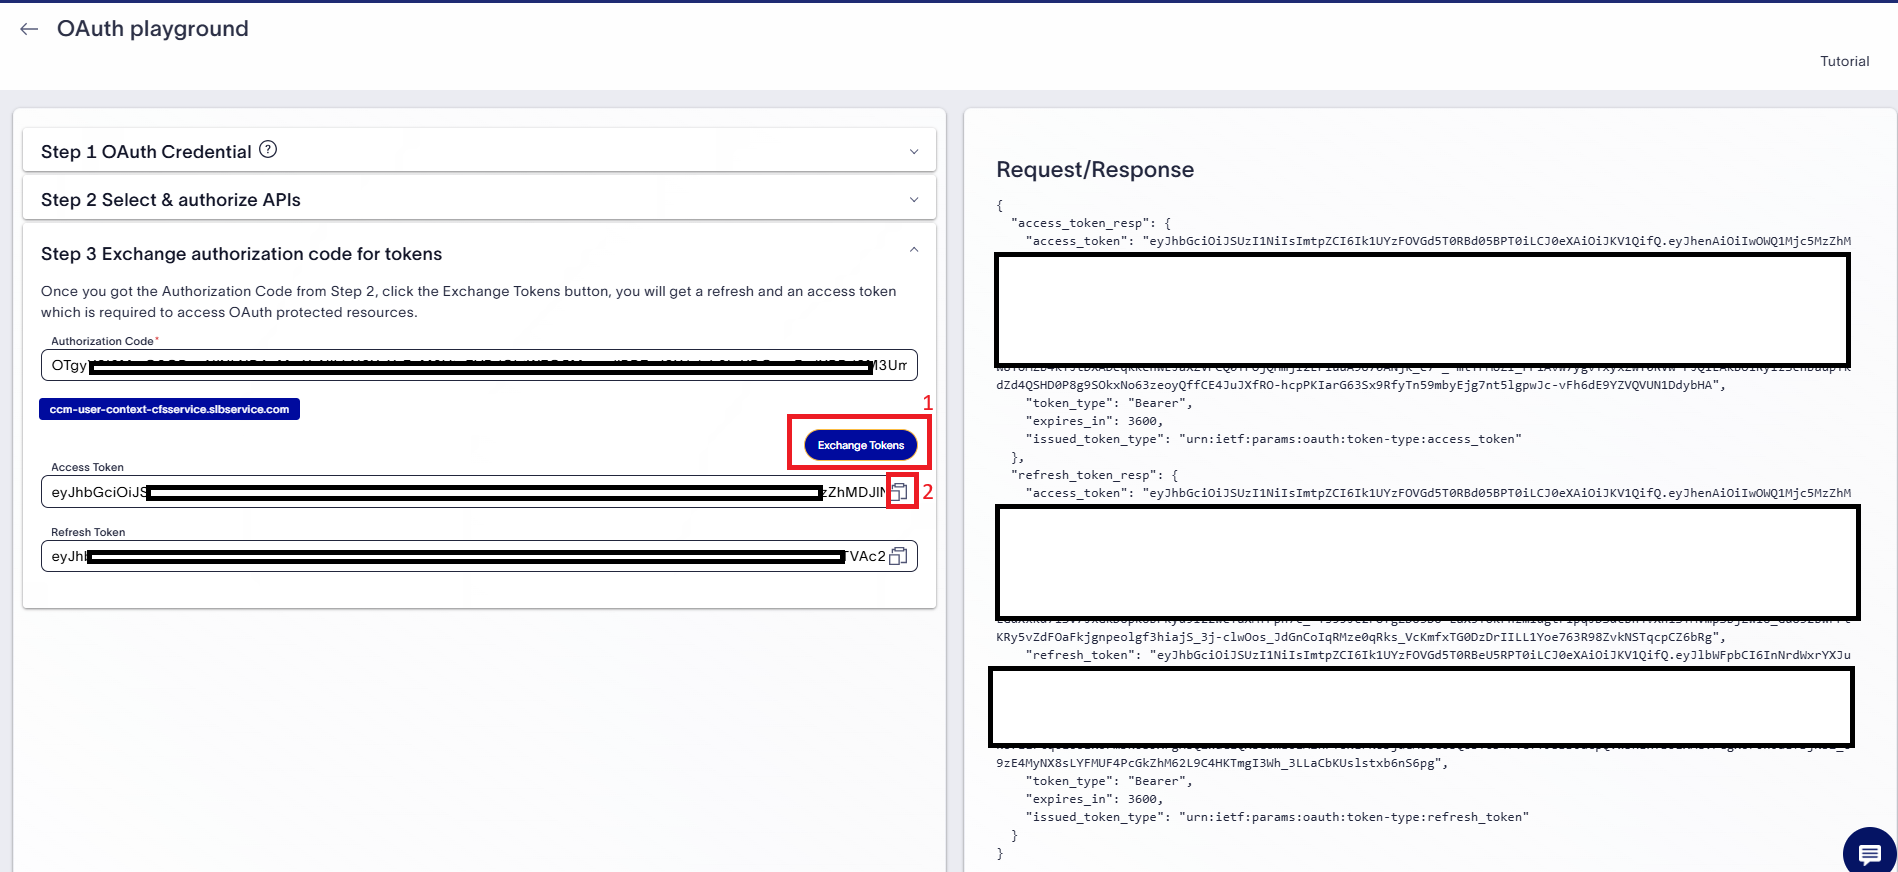
- Click the Exchange Tokens button as shown in the screenshot. This will generate a new access token that can be used to call the API. Click the Copy button to copy the token, as illustrated in the screenshot.
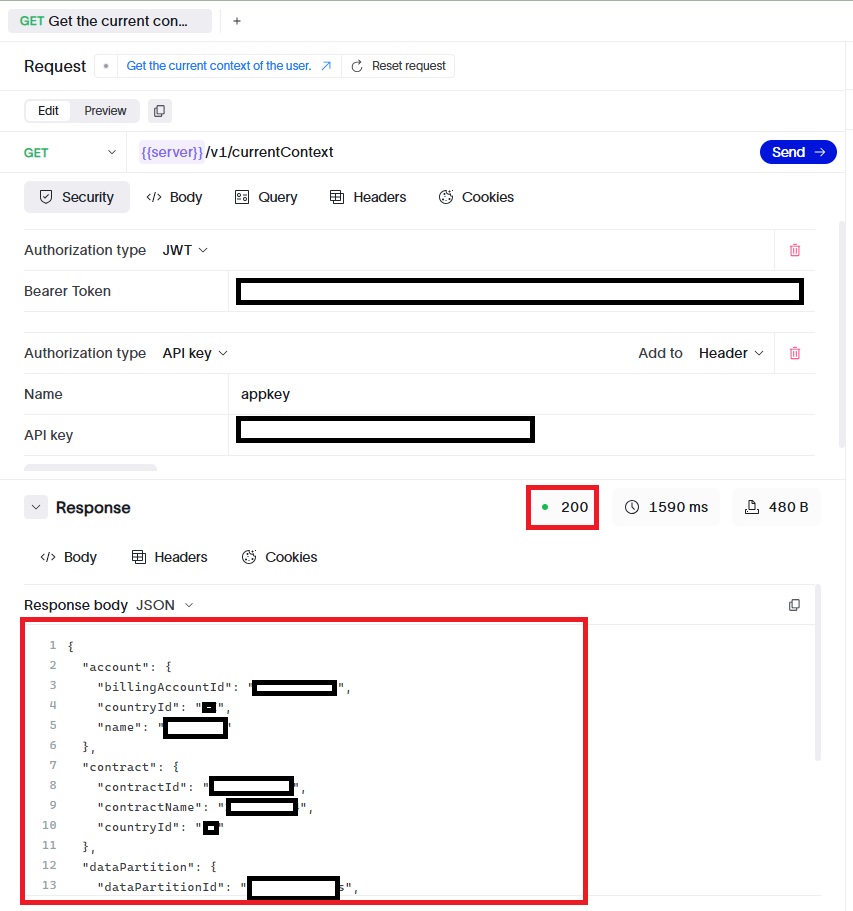
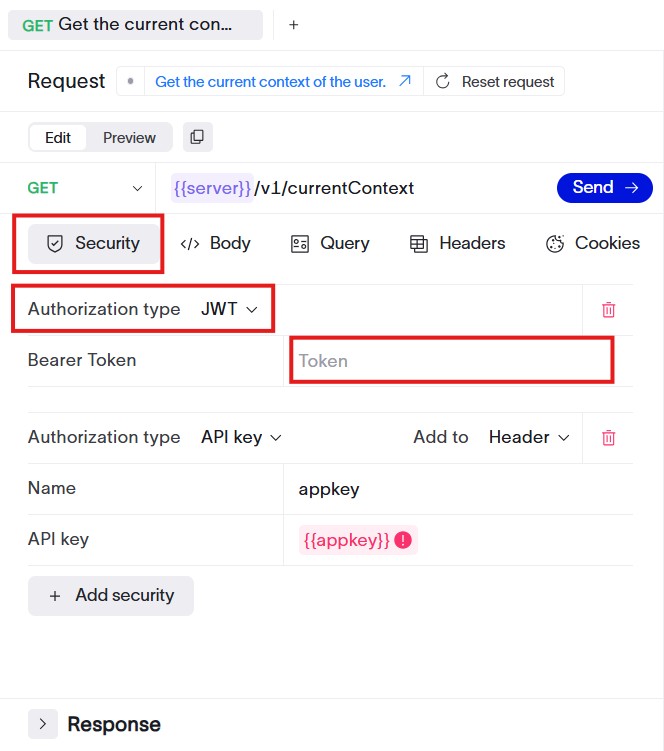
- Return to the API "Try It" screen and navigate to the Security section. Set the Authorization Type to JWT. Paste the S-Auth token (access token) obtained from the OAuth Playground into the highlighted input field, as shown in the screenshot below.
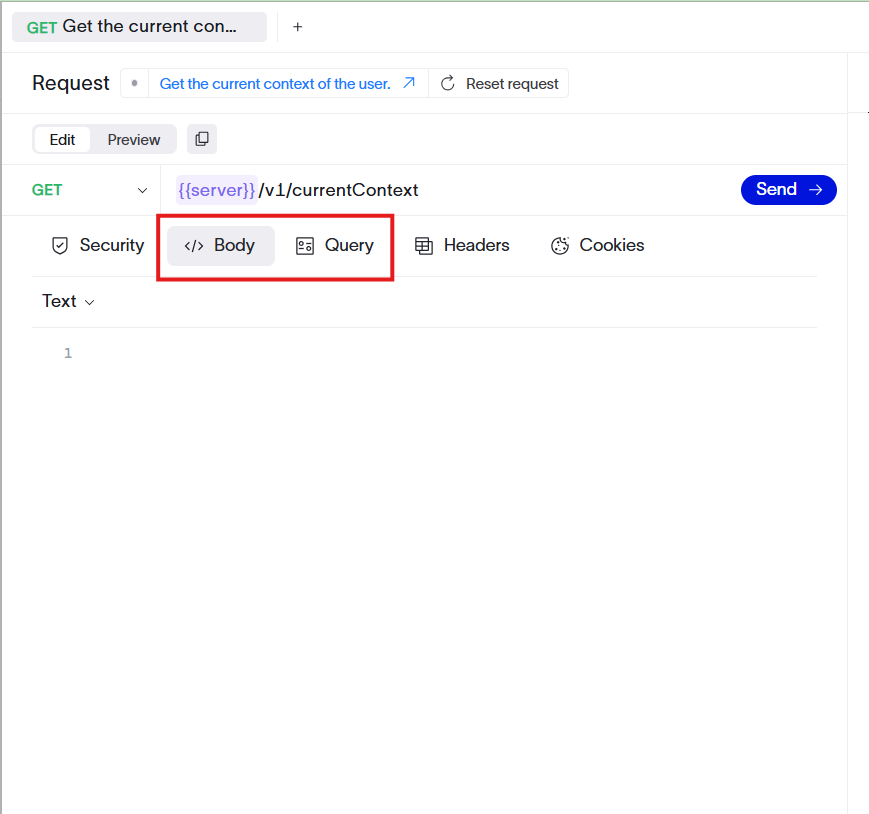
Provide Input Parameteres: If the API requires additional input in the body or query parameters, you can provide this on the corresponding tabs.
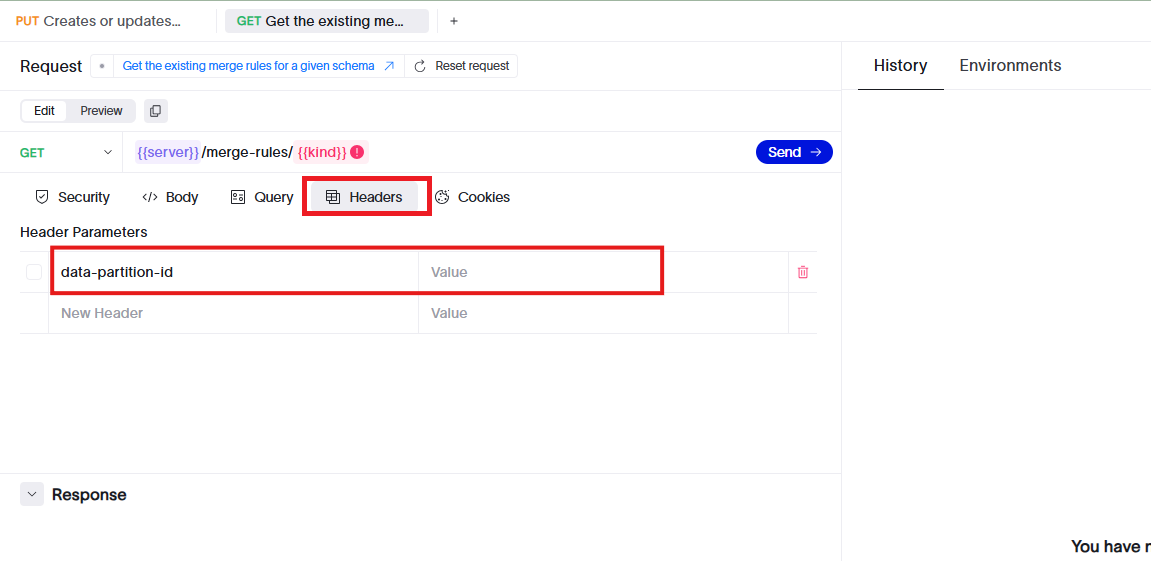
Provide Additional headers: Some APIs may require additional headers, such as "data-partition-id". Provide these values in the Headers section of the "Try It" screen, as shown in the screenshot below.
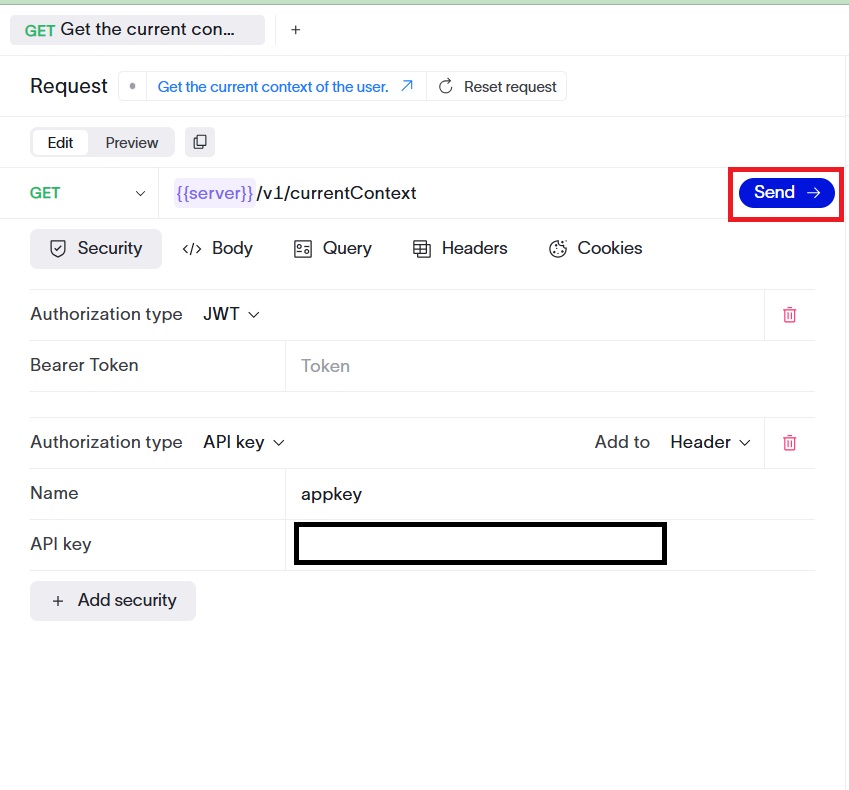
Once all input is provided, click Send to call the API endpoint.
14. The API response, including the status code and response body, is displayed at the bottom of the page, as illustrated in the screenshot below.